A Simple Bushcraft Backup for Campers
 There’s something reassuring about knowing you can light a fire without depending entirely on a lighter or a box of matches.
Modern camping gear is excellent — until it runs out of fuel, gets damp, or refuses to cooperate. That’s where an older method still earns its place in a kit:
- Flint and steel
- Char cloth
- A simple tinder
It’s compact, reliable, and quietly satisfying to use.
What Is Tinder?
Before going further, it helps to understand one key word. Tinder is the material that catches the very first spark or ember when starting a fire. It’s the most easily ignited layer in the whole process.
Think of fire in stages:
- Spark
- Tinder
- Kindling
- Fuel wood
The spark lands on the tinder. The tinder glows or flames. The kindling catches. Then the larger logs take over. Char cloth is a form of tinder. So is dry grass, birch bark, fine shavings — and yes, even dryer lint.
What Is a Tinderbox?
If you’ve always imagined a small metal box when you hear the word “tinder”, you’re thinking of a tinderbox. A tinderbox was the traditional kit used before matches were invented. It usually contained:
- Flint
- A steel striker
- Tinder (often char cloth)
So: Tinder = the material, while Tinderbox = the container and tools. The words get mixed up quite often, but they’re not the same thing.
What Is Char Cloth?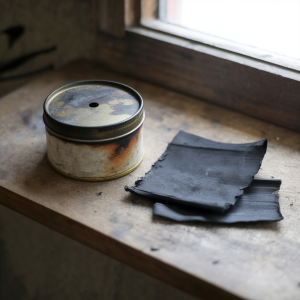
Char cloth is ordinary cotton fabric that has been heated in a low-oxygen environment until it carbonises. Instead of turning to ash, it becomes a lightweight black material that catches sparks extremely easily — making it excellent tinder. A tiny spark from flint and steel will land on char cloth and begin glowing almost immediately. That glowing ember can then be transferred into a larger bundle of tinder to build a flame. It’s a method that predates disposable lighters by centuries — and it still works.
How to Make Char Cloth
You’ll need:
- 100% cotton fabric (old t-shirts work well)
- A small metal tin with a tight lid
- A nail to make one small hole in the lid
- A fire or barbecue
Method:
- Cut cotton into small squares.
- Place them loosely inside the tin.
- Close the lid securely.
- Put the tin into a hot fire.
Smoke will begin escaping from the hole. That’s normal — gases are being released as the fabric carbonises. When the smoke stops, carefully remove the tin and allow it to cool completely before opening. DO NOT OPEN IT WHEN HOT. If oxygen rushes in, the contents can ignite. When fully cooled, the fabric should be black, lightweight and slightly fragile. That’s your char cloth. Store it somewhere dry.
Adding a Modern Tinder: Dryer Lint Tubes
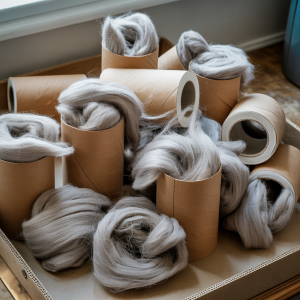 Char cloth excels at catching a spark. Dryer lint excels at turning that glowing ember into flame. You can remove the dryer lint from your tumbler dryer, making your house safer and then pack it into empty toilet roll tubes – most houses go through plenty of these! Packed into empty cardboard toilet roll tubes, lint becomes a compact, lightweight firelighter that’s easy to carry.
A few practical notes:
- Lint from mainly cotton loads works best.
- Synthetic-heavy lint may melt rather than burn cleanly.
- Keep finished tubes dry in a sealed bag.
When you place a glowing piece of char cloth into the lint and blow gently, the lint catches and produces a steady flame ready for kindling. Old method. Modern waste material. Quite a good partnership.
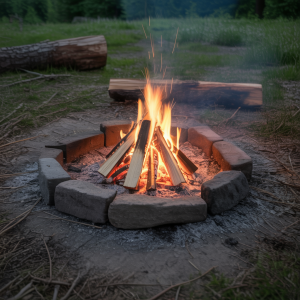
How the System Works Together
- Strike flint and steel.
- Catch the spark on char cloth (your tinder).
- Place the glowing cloth into the lint-filled tube.
- Blow gently until flame develops.
- Transfer to prepared kindling.
Spark → Tinder → Kindling → Logs.
Layered. Simple. Reliable.
Safety Considerations
Fire deserves respect.
- Only make char cloth outdoors or in a well-ventilated area.
- The tin becomes extremely hot — use tools to handle it.
- Allow it to cool fully before opening.
- Keep tinder well away from stoves, heaters or open flames until needed.
- Always follow campsite rules regarding open fires.
Dryer lint is highly flammable. That’s why it works — and why it must be stored responsibly. Never experiment with fire indoors.
Why Carry a Backup?
- Because weather changes.
- Because matches get damp.
- Because lighters fail at inconvenient moments.
Char cloth weighs almost nothing. A flint lasts for years. Lint tubes cost nothing to make.
It’s not about rejecting modern gear. It’s about having a quiet fallback.
And there’s something deeply satisfying about striking steel, seeing that first spark catch, and knowing you can make flame from very little.
 Would you Starve
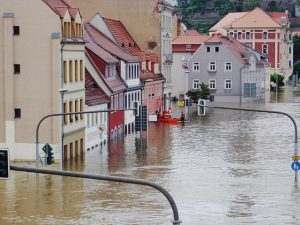 The UK government created a new campaign in May 2024 advising people in the UK to be prepared for emergencies including setting up a 3 day supply of non-perishable food that does not need cooking and a minimum of 3 litres of drinking water per person per day, preferably 10 litres per person per day to include cooking and hygiene.